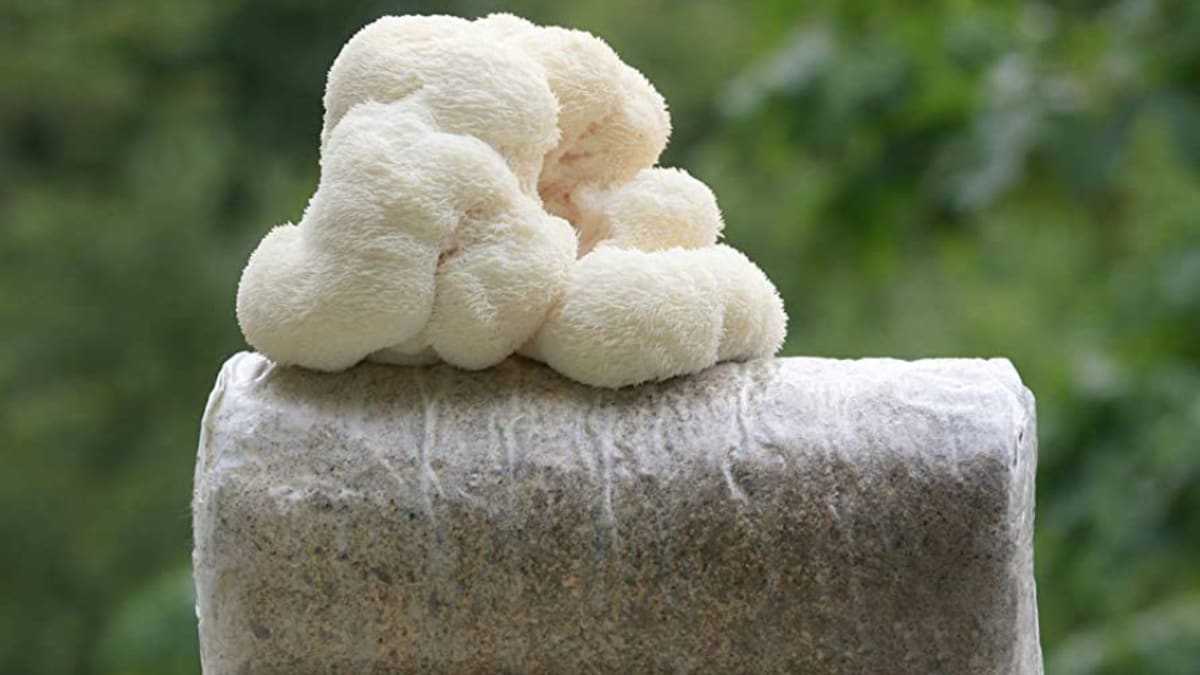
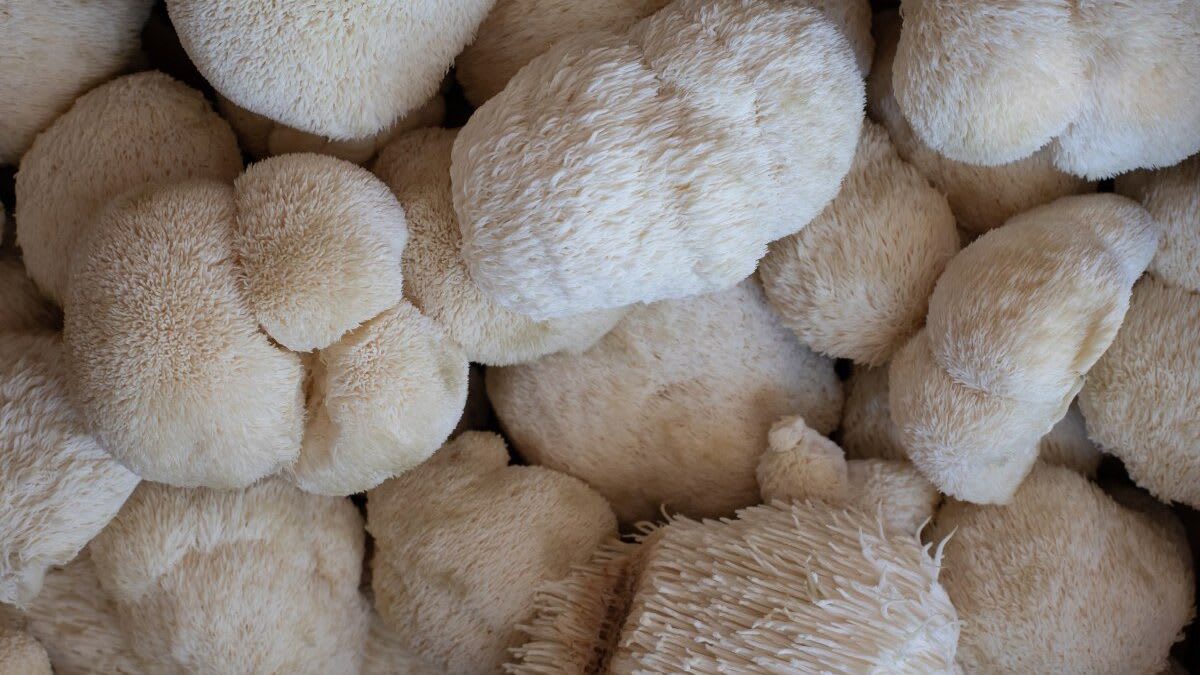
Lion's mane mushrooms look nothing like typical grocery store varieties. They form shaggy white clusters that resemble a waterfall of icicles or, as the name suggests, a lion's flowing mane. This distinctive appearance makes them instantly recognizable once you know what to look for.
We started growing lion's mane three years ago after getting frustrated with supplement quality. The fresh mushrooms taste completely different from dried extracts. There's a subtle seafood-like flavor that works well in stir-fries and soups. Growing your own also means full control over conditions and freshness, which matters if you care about what you're actually consuming.
Growing these mushrooms isn't difficult once you understand their basic needs. They prefer hardwood substrates, high humidity around 80 to 90 percent, and temperatures between 55 and 75 degrees Fahrenheit. Whether you choose a simple grow kit or full substrate preparation, the fundamentals stay the same.
Key Takeaways
- 1Grow kits produce harvestable mushrooms in 2 to 3 weeks with minimal effort
- 2Indoor bag cultivation yields mushrooms in 6 to 8 weeks from inoculation
- 3Log cultivation takes 6 to 18 months but produces for up to 6 years
- 4Optimal fruiting requires 80-90% humidity and temps between 55-75°F
- 5Harvest when spines are still short and tight for best texture
Why grow lion's mane at home
Fresh lion's mane has a texture and flavor that supplements simply cannot replicate. We cook ours sliced thick and pan-seared in butter until the edges crisp. Closer to crab than anything plant-based. People who've never had it fresh are usually surprised.
Beyond the kitchen, home cultivation eliminates the supply chain entirely. You know exactly what substrate was used. You control whether any pesticides or additives touch your harvest. For people interested in the cognitive and nerve-supporting compounds, fresher mushrooms mean higher bioactive content.
The economics work out favorably too. A single $25 grow kit produces roughly a pound of fresh mushrooms. Compare that to retail prices of $15 to $20 per pound at farmers markets. After your first harvest, the kit often produces a second and sometimes third flush with no additional investment.
There's something pre-supplement about growing your own food too. Watching mycelium work through a substrate and then seeing pins appear teaches you things no label can convey. You start to understand why traditional cultures bothered.
Choosing your growing method
The right method depends on your timeline and how much you want to learn about sterile technique.
Grow kits are the fastest path to a harvest. These work well for complete beginners. Someone handed us our first kit as a gift, and we had edible mushrooms within three weeks. The substrate arrives fully colonized. You just open it, mist daily, and wait.
Grain spawn to bulk substrate gives you more control and better yields per dollar spent. You purchase colonized grain and mix it into pasteurized hardwood sawdust or straw. This method requires understanding contamination prevention. We lost our first two batches to green mold before figuring out proper pasteurization times.
Liquid culture gives you the ability to create your own spawn indefinitely. A single syringe can inoculate dozens of grain jars. This method demands sterile technique and some equipment like a pressure cooker and still air box. We didn't attempt this until our second year.
Log inoculation suits people with outdoor space and patience. You drill holes into fresh hardwood logs, insert plug spawn, and seal with wax. The mushrooms won't fruit for 6 to 18 months. But once they start, a single log can produce for six years or longer.
| Method | Time to Harvest | Difficulty | Best For |
|---|---|---|---|
| Grow kit | 2-3 weeks | Easy | Beginners |
| Grain spawn to bulk | 6-8 weeks | Moderate | Regular growers |
| Liquid culture | 8-12 weeks | Advanced | Self-sufficient cultivation |
| Log inoculation | 6-18 months | Easy but slow | Long-term outdoor supply |
Growing with a ready-made kit
Kits remove every complicated variable from the equation. The substrate arrives already colonized with lion's mane mycelium. Your job is simply to trigger fruiting conditions.
When your kit arrives, inspect it for any green, black, or orange patches. These colors indicate contamination. Healthy lion's mane mycelium appears white and cottony. Some kits show slight yellowing which is normal. Bright colors mean the kit was compromised during shipping.
Find a spot away from direct sunlight and heating vents. We keep ours on a kitchen counter where we remember to mist regularly. The location should stay between 60 and 75 degrees. Avoid bathrooms despite the humidity appeal because temperature swings from showers cause problems.
Cut an X shape or remove a section of the plastic bag to expose the substrate. This creates the fruiting window where mushrooms will emerge. Within days you should see small white pins forming. These develop into the characteristic shaggy masses over the next week.
Mist the exposed area at least twice daily. The substrate surface should look moist but not soaking wet. Standing water invites bacterial contamination. Use a fine mist spray bottle held about a foot away from the opening.
Harvest when the spines reach about half an inch but before they start to separate and droop. Waiting too long results in bitter flavor and spongy texture. Twist the mushroom gently at the base or use a clean knife. After harvesting, continue misting for a second flush that typically appears within two weeks.
Indoor cultivation with grain spawn
This method produces larger yields once you master the basics. We transitioned to grain spawn after our fifth or sixth grow kit.
Start with colonized grain spawn from a reputable supplier. Rye berries and whole oats are common choices. The grains should be covered in white mycelium with no bare spots or off colors. Shake the bag or jar to check that everything moves freely. Clumped wet grains suggest bacterial contamination.
Your bulk substrate needs preparation. Hardwood fuel pellets work well and are widely available at hardware stores. Mix five pounds of pellets with enough water to achieve field capacity. This means the substrate holds moisture but releases only a few drops when squeezed firmly. We measure roughly 1.5 liters of water per 5 pounds of dry pellets.
Pasteurization kills competing organisms without destroying beneficial bacteria. Heat your substrate to 160 to 180 degrees Fahrenheit and hold for one hour. Use a large pot or cooler with boiling water added. Let the substrate cool completely before mixing in spawn.
Work in a clean area with minimal air movement. We sanitize our workspace with isopropyl alcohol and close windows to reduce airborne contaminants. Mix spawn into the substrate at roughly 10 to 20 percent by volume. Higher spawn rates colonize faster but cost more.
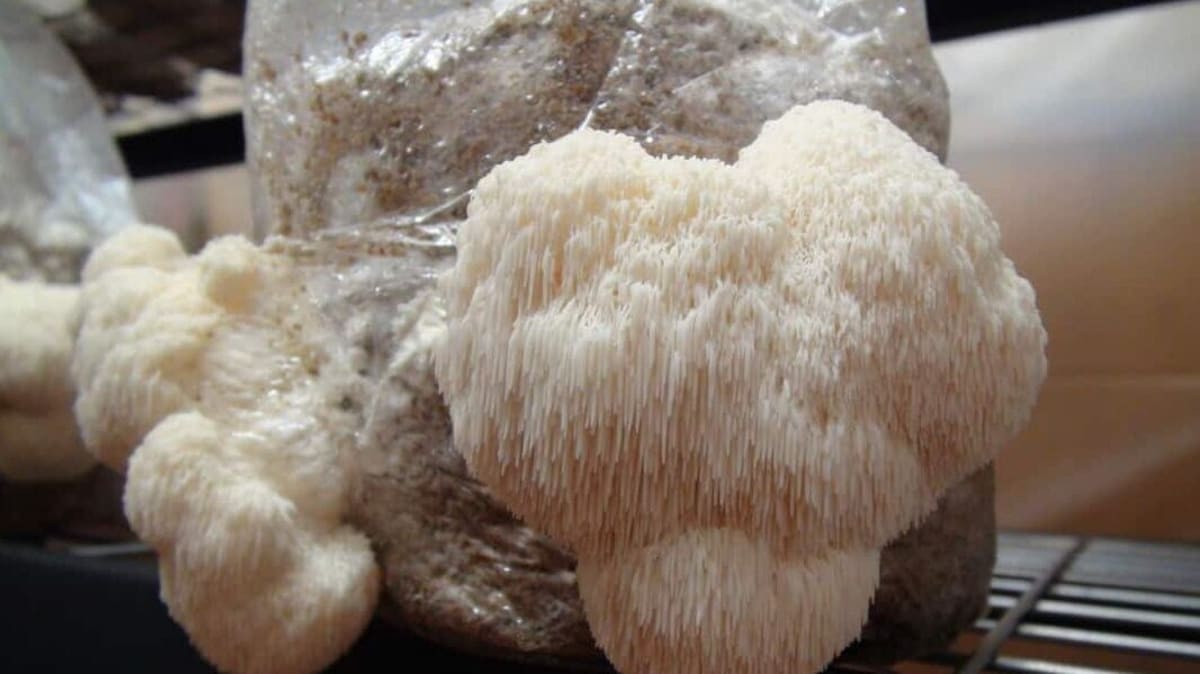
Pack the mixture into filter patch bags or buckets with holes drilled for air exchange. Lion's mane needs more fresh air than many other species. Without adequate gas exchange, the fruits develop stunted and coral-like rather than forming proper cascading spines.
Colonization takes 2 to 4 weeks depending on temperature and spawn rate. Keep the bags at 70 to 75 degrees during this phase. Once the substrate turns completely white, move to fruiting conditions with higher humidity and lower temperatures around 55 to 65 degrees.
Outdoor log cultivation
Logs produce mushrooms for years with minimal ongoing effort. This traditional method suits growers with access to fresh hardwood.
Oak, maple, beech, and other hardwoods work well. Avoid softwoods like pine and cedar. The ideal log diameter runs 3 to 8 inches with lengths of 3 to 4 feet. Cut logs in late winter or early spring when sugar content peaks and bark adheres tightly.
Wait 2 to 4 weeks after cutting before inoculating. This allows competing fungi to die back while the wood remains moist enough for lion's mane to colonize. Logs cut too early carry organisms that outcompete your intended species. Logs left too long dry out.
Drill holes in a diamond pattern spacing them about 4 inches apart along the log. Use a 5/16 inch drill bit sized for standard plug spawn. The depth should match your plug length, typically about 1 inch.
Tap plug spawn into each hole using a hammer or mallet. The plugs should sit flush with the bark surface. Seal each hole with cheese wax or beeswax melted in a small pot. This prevents drying and blocks competing spores from entering.
Stack inoculated logs in a shady spot with good drainage. We lean ours against a fence on the north side of the house. Direct sun dries logs too quickly. Heavy shade works fine because lion's mane fruits readily in low light.
Water logs during dry periods. The bark should never crack from dehydration. Some growers soak logs for 24 hours once monthly during summer. We just run a sprinkler over ours when rainfall stays absent for more than two weeks.
First fruits typically appear 6 to 18 months after inoculation. Timing varies with log diameter, climate, and spawn vigor. Thinner logs fruit sooner but exhaust faster. Four inch diameter logs often produce for 4 to 6 years.
Troubleshooting common problems
Green mold means Trichoderma has taken hold. If it's spreading, throw the batch out. Small isolated patches can sometimes be carved away and salted, which buys time, but mold usually wins once it's taken hold. Tighten your pasteurization window and transfer spawn in a cleaner area next run.
Slow or stalled colonization is almost always a temperature problem. Get a thermometer in there. Lion's mane mycelium wants 70 to 75°F. Drop below 60 and it barely moves. Push above 80 and the mycelium starts to weaken, which opens it up to competitors.
Stunted or coral-like fruits are a CO2 problem, and lion's mane is more sensitive to gas exchange than most species we've grown. Even a slightly closed environment will push the mushrooms into that urchin shape instead of cascading spines. More holes, or point a fan toward the container for 20 minutes twice a day.
Yellowing mushrooms before the spines develop usually mean heat or direct light. Move the container. If yellowing only shows near the tips right before you planned to harvest anyway, that's normal spore-release coloring. Early yellow on young pins is stress.
Dry and cracked substrate is a misting problem. Lion's mane wants 80 to 90 percent humidity during fruiting, which is harder to maintain than people expect. If twice-daily misting isn't keeping up, rig a humidity tent from clear plastic with a few small holes poked in for air exchange.
Mushrooms falling apart at harvest means you missed the window. Lion's mane goes from perfect to papery fast. Once the spines elongate past an inch and start flopping outward, the texture has already shifted. Aim for half an inch with spines still pointing upward.
Harvesting and storage
The harvest window is brief. Watch daily once spines appear.
Young lion's mane has spines that point inward or slightly upward, and the whole mass looks dense and solid white, almost like a snowball growing off the substrate. When peak maturity hits, those spines hang downward in cascades. After that, it goes fast.
Harvest by twisting the entire cluster at its base. A clean knife works if twisting proves awkward. Avoid pulling which can damage the mycelium and reduce future flushes. Leave a small stub attached to the substrate to prevent contamination entry.
Fresh lion's mane stores refrigerated for 5 to 7 days. We wrap ours loosely in paper towels inside a paper bag. Plastic containers trap moisture and accelerate spoilage. The mushrooms should feel firm, not slimy.
For longer storage, dehydration works well. Slice into quarter inch pieces and dry at 115 to 125 degrees until completely crisp. Properly dried lion's mane stores for a year or more in airtight containers. Rehydrate in warm water before cooking.
Freezing fresh mushrooms produces disappointing texture. If you want frozen lion's mane, sauté first until golden then freeze. These work well in soups and stews where texture matters less.
What makes home grown different
Commercial growers optimize for yield and shelf life. Home growers optimize for flavor and freshness.
We harvest minutes before cooking. The mushrooms never experience cold chain handling or days in shipping containers. You can taste the difference, especially pan-seared, where the texture holds instead of turning soft and waterlogged.
Home growing teaches you what quality actually looks like. After handling dozens of harvests, you recognize within seconds whether a farmers market specimen was picked at peak or left sitting too long in a crate somewhere.
The bioactive compounds that make lion's mane interesting for brain health concentrate in fresh fruiting bodies. Hericenones and erinacines begin degrading after harvest. Commercial supplements use extracts that compensate for this, but fresh mushrooms offer something extracts cannot replicate.
Cultivation skills transfer. Once you've worked through lion's mane, oyster mushrooms feel straightforward by comparison. From there shiitake, reishi, maitake. The learning stacks, and each new species takes less time to figure out than the last.
Frequently Asked Questions

Gordon is a former high-tech researcher who traded his silicon chips for spores. With a background in molecular visualization, he spends his time mapping the intricate structures of medicinal fungi.